
Edamame / Black Edamame
Edamame / Black Edamame

 |
The type of soil used varies depending on the product; please determine this based on the soil you have. Before placing the seeds, ensure the soil is moist. You can do this by using the following methods: |
 |
1 | Place the soil in a container and add waterPlace the potting soil into a flowerpot or container, slowly pour in water, and use chopsticks to thoroughly stir the soil to moisten it. |
 |
2 | Put the soil into a bag and add waterFill the bag with potting soil, then slowly pour in water until the soil is moist. |
Planting tips:
It is recommended to sow 1/3 of the seed quantity first (e.g., sow 3 out of 9 seeds) to maintain proper spacing. After the seedlings emerge, thin them out as needed, removing weak seedlings and keeping the strongest plants to provide more growing space.


Basic Planting Guidelines for Edamame / Black Edamame
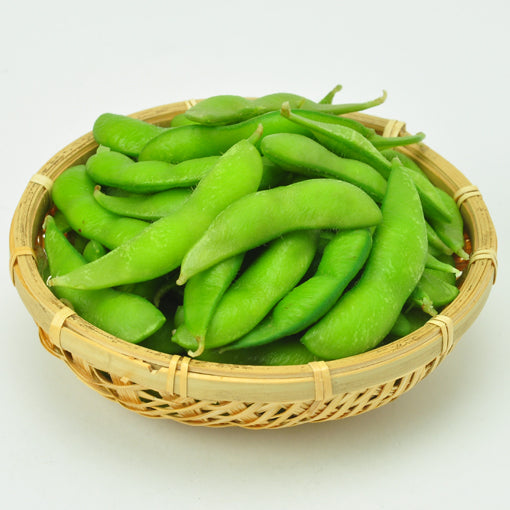
Edamame is one of the tender pods of soybeans. Rich in protein and delicious, it's often called "meat of the field." It's a popular snack to enjoy with drinks when in season. Black edamame, with its unique flavor, is even more suitable for pairing with alcohol, a deliciousness unmatched by other varieties.
|
Ideal ambient temperature: around 15~25°C |
Make sure the seeds are covered with soil. The depth shown in the diagram is approximately 1 cm . |
|
Avoid soil drying The soil must be kept moist. If it is too dry, the seeds will not be able to absorb water and will fail to germinate. |
Until it sprouts, place it in a shady place for half a day. Avoid direct sunlight; place in a semi-shaded area (with diffused light). |


Seed burying method
 |
Dig a hole about 1 cm deep, sow the seeds, cover them with soil, and then water them thoroughly . |
Post-germination management
Watering after germination and in the early stages of growth should be done gently , for example, using a sprayer , to avoid wetting the leaves with water droplets.
Water thoroughly only after the soil has completely dried .
 |
Thinning out seedlingsLeave 2 buds (thinning out the seedlings) . Remove any undesirable or poorly growing buds by gently pressing down on the roots and transplanting them to another location, or thin out the seedlings. |
 |
Lighting and ventilationManage it in a sunny and well-ventilated place. Sunlight is very important for plants. Because they are sun-loving plants, it's important to ensure good ventilation and provide them with adequate sunlight. |
 |
Leaf cuttingCut off the leaves. When the stem and leaves grow with three overlapping leaves (as shown in the picture), cut off the tips of the leaves. |
 |
Erect pillarsEstablish pillars. About a month later , support pillars should be erected to support the stem, taking care to prevent it from being blown over by the wind. Subsequent management and harvesting: The stem grows upwards, and when the flowering buds emerge, they are guided (induced) to twine around the support. Use scissors to cut off the top of the stem for harvesting. The best time to harvest is when the fruit is fully ripe and the entire stem turns yellow . |
- Inappropriate temperature <br />The ideal temperature for germination is 15–25°C . Please confirm that the sowing environment is maintained within the appropriate temperature range.
- The soil is too dry . If the soil is not moist enough, the seeds will dry out, which will lead to a decrease in germination rate.
- Too much moisture in the soil will prevent the seeds from breathing and may even cause them to rot, thus affecting germination.
- Seed aging or individual differences <br>If the seeds are too old or of poor quality, the germination rate will be lower.


After germination and in the early stages of planting, water gently with a thin stream of water (such as a spray bottle) to avoid washing away the seedlings with a strong flow. Water thoroughly when the soil surface is dry.

Why didn't the seed sprout? Let us help you find out the reason.

Reason 1: Overwatering (root rot)
Reason 1: Overwatering (root rot)
Another reason is over-care and excessive daily watering.
If the soil is too wet, the roots cannot breathe and will rot and die. The roots will shrink and disappear, turn brown, and become thin and fragile.

Reason 2: Dryness
If you forget to water your plants, the soil will dry out and the plants will wither.
The leaves will become dry and brittle.
If there is still moisture in the leaves, water them thoroughly.
They might be able to recover.

Reason 3: Lack of sunlight (Extended)
If the seedlings do not receive enough sunlight after germination, the stems will grow too quickly and eventually break under the weight of the flower heads, causing the plant to wither. Make sure the plant receives ample sunlight and avoid overwatering.

Reason 4: The temperature is not suitable
Every plant has its optimal growth temperature.
Both excessively high and low temperatures can slow down plant growth and even cause plants to wither.


Germination Guarantee
Did your seeds fail to germinate? Don't worry! Please contact us anytime, and we will send you replacement seeds free of charge. Your gardening experience is our top priority.